When it comes to running an online store, images aren’t just an afterthought—they’re often the first thing that catches a shopper’s eye.
A crisp, well-lit photo can be the difference between someone clicking “add to cart” or clicking away. I know it might seem daunting to get those perfect product shots, but trust me, with a few simple tweaks, you can make your photos stand out and help your sales soar.
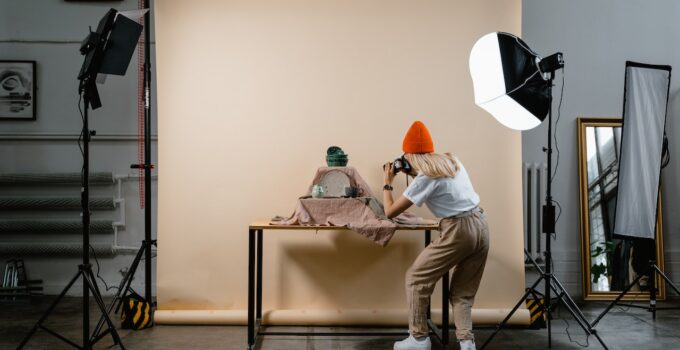
The Power of Good Lighting
Source: scandigital.com
Let’s start with the foundation of any good photo: lighting. Poor lighting can turn even the most amazing product into something that looks unappealing.
Natural light is your best friend here, and if you have access to a space with good natural light, you’re halfway there. To explore more tools that can help enhance your product photography, visit productscope.ai and see just how diverse your options actually are.
Tips for Using Natural Light
- Shoot near a window: Soft, diffused light from a window is ideal. If the sunlight is too harsh, try using a sheer curtain to soften it.
- Avoid direct sunlight: Direct sunlight can cause harsh shadows and overexposure. The goal is to have an even distribution of light across your product.
- Golden hour: If you’re shooting outside, aim for the golden hour—the hour after sunrise or before sunset—when the light is softer and more flattering.
Setting the Scene
Your product is the star, but what’s in the background matters too. A cluttered or distracting background can take the focus away from what you’re trying to sell. But don’t worry, you don’t need a fancy studio setup to get it right.
Tips for a Clean Background
- White backgrounds work wonders: They’re clean, professional, and keep the focus on your product. You can use a large sheet of white paper or a white wall.
- Consider context: Sometimes a white background isn’t enough. If you’re selling lifestyle products, showing them in their natural environment can help customers imagine how they’ll use the product.
- Keep it simple: Even if you’re using props, keep them minimal and relevant to your product. Less is often more.
Composition is Key

Source: tadpull.com
How you position your product in the frame can make a huge difference. Good composition helps guide the viewer’s eye to the most important parts of the image. But don’t let that word scare you—it’s really just about arranging things in a way that feels balanced and pleasing to the eye.
Tips for Better Composition
- Rule of thirds: Imagine your image divided into nine equal parts by two horizontal and two vertical lines. Try placing your product along these lines or at their intersections to create a more balanced image.
- Fill the frame: Don’t be afraid to get close to your product. Filling the frame with your product can create a more engaging image.
- Use leading lines: If your product has lines, like the edges of a box or the seams of a fabric, use them to draw attention to the product or key features.
Don’t Forget About Angles
Sometimes, a product just doesn’t look right from a straight-on view. Experimenting with different angles can give your customers a better idea of what they’re buying and showcase features that might be overlooked otherwise.
Tips for Finding the Right Angle
- Shoot from above: This works well for flat lays, like clothing or accessories. It gives a comprehensive view of everything in the frame.
- Try a 45-degree angle: For many products, especially those with depth (like shoes or bags), a 45-degree angle can show off the product’s dimensions and features.
- Show multiple angles: If your product has interesting details, like intricate stitching or a unique design, show it from multiple angles to highlight what makes it special.
Editing & the Finishing Touches

Source: pixelphant.com
Even the best shot can benefit from a little editing. You don’t need to be a Photoshop wizard to make your photos look polished and professional. Simple adjustments can make a world of difference.
Tips for Simple Edits
- Adjust brightness and contrast: Small tweaks can make your images pop and ensure they’re not too dark or washed out.
- Crop carefully: Use cropping to eliminate unnecessary background and focus attention on the product.
- Consistency is key: If you’re editing a batch of photos, try to maintain a consistent look and feel across all images. It helps your store look more cohesive and professional.
The Tools You Need for the Job
You might be wondering if you need to invest in a fancy camera to get great photos. The good news is that you don’t! While a DSLR camera can give you more control and higher-quality images, a modern smartphone can do the job just fine, especially if you follow the tips above.
Tips for Choosing Your Gear
- Smartphone cameras: If you’re using a smartphone, make sure it’s a model with a good camera. Newer models usually come with features like portrait mode and manual controls that can help improve your shots.
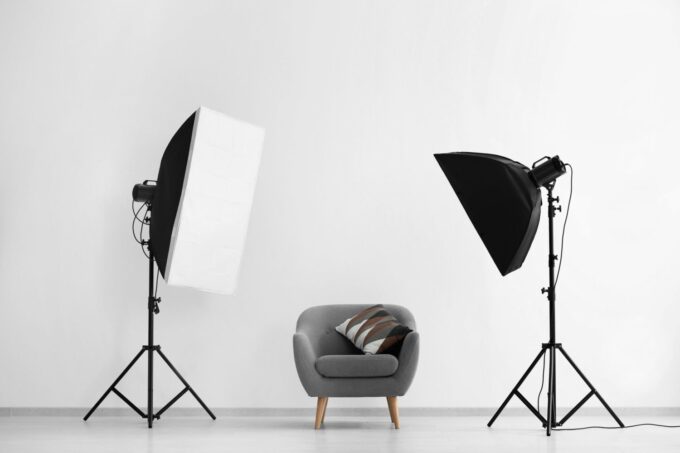
- Tripod: A tripod can be a game-changer, especially if you’re dealing with low light or want to keep your shots consistent. There are plenty of affordable options that work with both cameras and smartphones.
- Lighting kits: If natural light isn’t an option, consider investing in a basic lighting kit. They can help you achieve consistent lighting and make your images look more professional.
Showcase Your Product’s Best Features

Source: jeskabaileyphotography.com
Not all products are created equal, and some have features that really need to be highlighted. Whether it’s the texture of a fabric, the shine of a metal, or the intricate details of a design, capturing these can make a big difference in how your product is perceived.
Tips for Highlighting Features
- Close-ups: Don’t be afraid to get up close and personal with your product. A macro shot can capture the fine details that might get lost in a wider shot.
- Lighting: We’ve talked about lighting before, but it’s worth mentioning again—good lighting can help highlight textures and materials, making them more appealing to your customers.
- Props and models: Sometimes, using a prop or model can help showcase your product in a real-world setting, making it easier for customers to picture themselves using it.
Show Variety
One photo is never enough. Shoppers want to see your product from multiple angles, in different settings, and sometimes even in different variations like color or size. This not only helps build trust but also allows customers to get a complete picture of what they’re buying.
Tips for Providing Variety
- Multiple angles: As mentioned earlier, showing your product from different angles is crucial. It gives customers a fuller picture and can prevent any surprises when they receive the product.
- Different settings: If applicable, show your product in different settings or use cases. For example, if you’re selling a jacket, show it being worn in both a casual and a more formal setting.
- Include all variations: If your product comes in different colors or sizes, make sure to include photos of each. It saves your customers from guessing what the other options look like.
Wrapping It Up
Taking great eCommerce photos doesn’t have to be complicated or expensive. With a little attention to lighting, composition, and editing, you can create images that not only showcase your products in the best light but also connect with your customers on a deeper level. Whether you’re using a smartphone or a DSLR, what really matters is how you use it. So grab your camera, experiment with different setups, and watch your product images—and your sales—improve.
Remember, the goal is to make your products look as good as they do in real life, if not better. And with the right techniques, you’ll be well on your way to creating images that boost your eCommerce success.


