When I first started with 3D printing, I thought it would be plug-and-play. You grab a file, hit “print,” and wait for magic to happen. In reality, my first few prints looked like melted gummy bears. That’s when it hit me: preparing a model for 3D printing is as important as the printer itself.
This guide is built for beginners who want to avoid those painful fails and actually enjoy the process. Think of it as the checkpoint system in a game: each step you clear brings you closer to a flawless final boss – your successful print.
Picking the Right File Format Is Like Choosing Your Loadout
Every gamer knows you can’t go into a raid with the wrong gear. It’s the same with 3D printing files. STL is your trusty default weapon: simple, widely supported, and perfect for most tasks. OBJ and 3MF, on the other hand, carry more detail and are like upgraded weapons with attachments – useful, but not always necessary.
The real mission? Making sure your model is watertight. Holes, flipped normals, or floating geometry are like glitches in a game: they’ll break everything later. Free repair tools like Meshmixer are the bug-fix patches you need before you hit the “print” button.
Leveling Up ─ From Sketches to 3D Reality
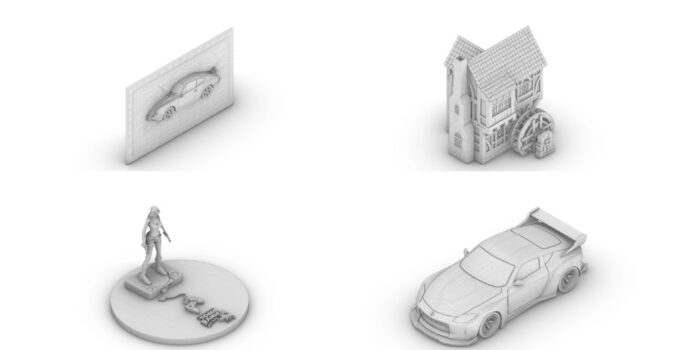
Not every project starts in Blender or Fusion 360. Sometimes you’ve just got a drawing, a logo, or even a photo you want to bring to life. This is where conversion tools save the day. Services like image to 3d model let you turn flat ideas into printable 3D geometry. It feels like unlocking a hidden character: suddenly your scribble on paper can become a keychain, figurine, or custom badge.
For beginners, this shortcut is golden. Instead of spending hours learning sculpting software, you can fast-track into the fun part – holding your creation in real life.
Scaling, Orientation, and Structural Strength ─ The Strategy Layer
This is the part most new players (and printers) get wrong. A model may look perfect on screen but end up as a fragile, half-melted mess if you don’t respect scale and orientation.
- Scaling: Double-check units. Inches vs millimeters is the classic rookie trap. Your mighty sword design could come out as a tiny toothpick if you mess this up.
- Orientation: Think tactically. Printing a tower flat wastes supports and weakens it, while printing vertically makes the layers stack stronger.
- Wall thickness: Anything under 1 mm is like rolling into a dungeon without armor. It won’t survive.
Get these right, and you’ve just unlocked the mid-game of 3D printing.
Optimizing Meshes Without Losing Style Points
High-poly models look amazing in CAD but are murder on slicing software. Think of it like trying to run a new AAA game on a budget laptop – it’ll stutter, crash, and frustrate you.
Use mesh decimation to reduce complexity. Most slicers can’t even show details smaller than your nozzle diameter anyway. For a standard 0.4 mm nozzle, anything finer just gets lost. Simplify smartly, and you’ll save both your slicer and your printer from lag spikes.
Supports and Overhangs ─ Training Wheels That Matter
Your printer can’t defy gravity. Any part of a model that hangs more than 45 degrees is basically a floating platform without collision detection – it will fail.
Supports are the training wheels of the 3D printing world. They’re annoying because you’ll have to snap and sand them off later, but without them, your print will collapse mid-way. The trick is to minimize support use: rotate the model, slice it differently, or split it into parts. The less support, the smoother your victory lap.
Source: sunbiotan.online
The Slicing Stage ─ Your Final Boss Check
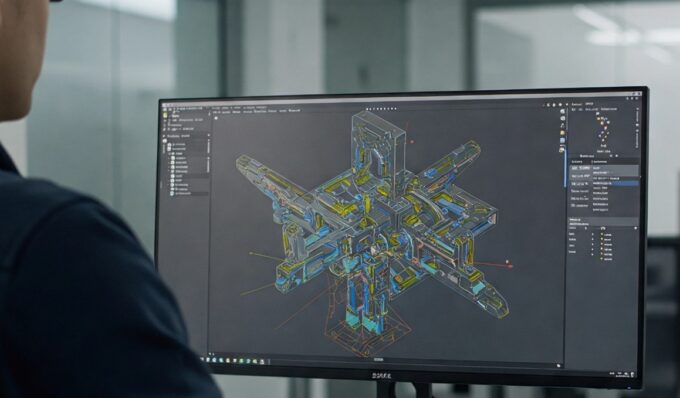
Slicing software is where your model gets turned into G-code, the actual set of instructions your printer follows. This is the point where beginners often rush – and regret it.
Previewing slices is like checking a mini-map before you charge ahead. You’ll see exactly how each layer prints, where infill happens, and if your walls are solid. If something looks off here, it will absolutely fail in real life. Catch it now, save yourself from a wasted spool later.
Practical Workflow ─ The “Speedrun” Route
Here’s the streamlined path I use:
- Design or Convert → Get your model into STL/OBJ.
- Repair Mesh → Fix holes, flipped normals, or rogue geometry.
- Scale & Orient → Set correct units and find the best angle.
- Optimize Mesh → Cut down poly count for smoother slicing.
- Generate Supports → Add only where absolutely necessary.
- Slice & Preview → Check layer view before exporting.
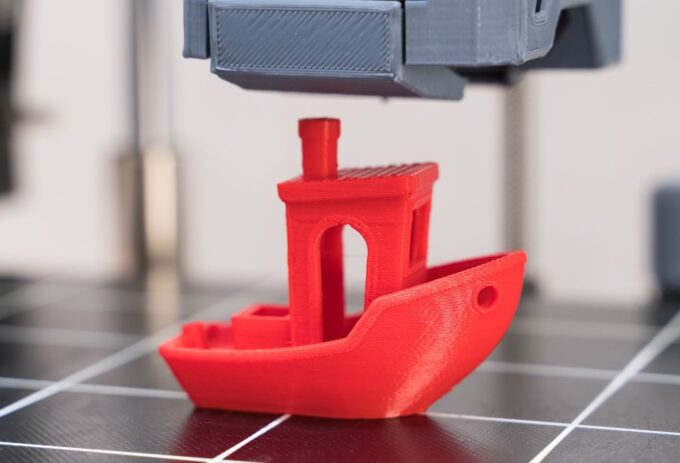
- Print & Monitor → Watch the first layers like it’s a new raid – if they go wrong, reset.
Common Failures and How to Save the Print
Even pros get failed prints. The difference is knowing how to recover:
- Warping corners: Use a heated bed or add a brim/raft.
- Stringy mess: Lower nozzle temp, tweak retraction.
- Hollow walls: Increase shell thickness in slicer.
- Weak parts: Raise infill percentage or use stronger filament.
The more you troubleshoot, the more you’ll level up your real-life “3D printing skill tree.”
Source: blogs.sw.siemens.com
Wrapping It Up
Preparing a print ready file isn’t just busywork – it’s the secret sauce that makes 3D printing satisfying instead of rage-inducing. Think of each step as grinding XP: repair your mesh, orient with purpose, preview slices, and you’ll actually enjoy unboxing the finished piece.
The best part? Once you build this workflow into muscle memory, you’ll spend less time fixing failures and more time creating. And trust me, nothing beats the moment when you hold something in your hand that used to live only on your screen.


